FCM via APNs Integration
caution
This guide applies to both iOS & macOS Flutter apps, repeat each step for the platforms you require. E.g. if you support iOS & macOS then you will need to integrate twice, once per platform Xcode project.
Integrating the Cloud Messaging plugin on iOS & macOS devices requires additional setup before your devices receive messages. There are also a number of prerequisites which are required to be able to enable messaging:
- You must have an active Apple Developer Account.
- For iOS; you must have a physical iOS device to receive messages.
- Firebase Cloud Messaging integrates with the Apple Push Notification service (APNs), however APNs only works with real devices.
Configuring your app#
Before your application can start to receive messages, you must explicitly enable "Push Notifications" and "Background Modes" within Xcode.
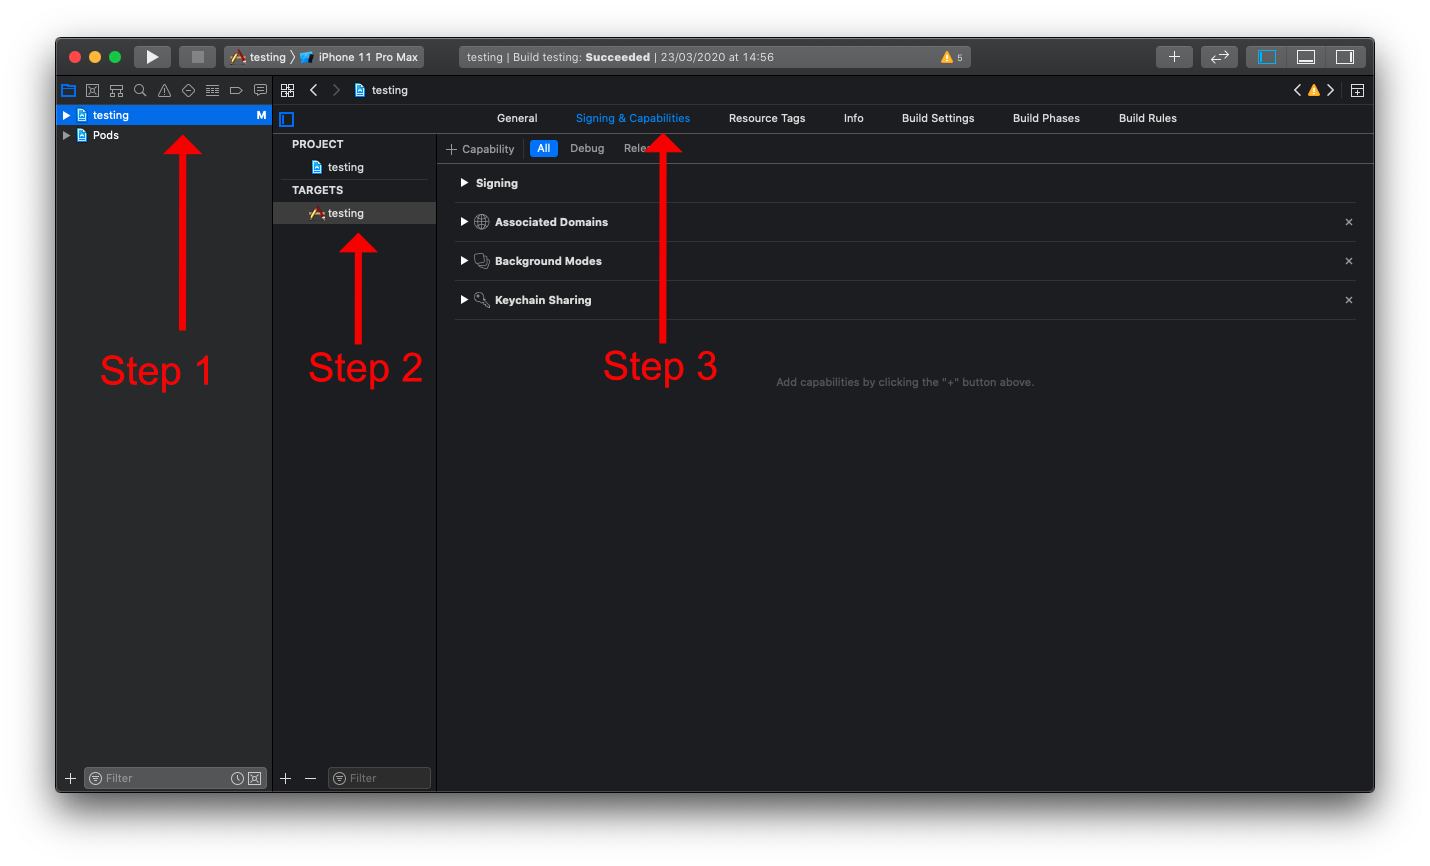
Open your project workspace file via Xcode (/{ios|macos}/Runner.xcworkspace). Once open, follow the steps below:
- Select your project.
- Select the project target.
- Select the "Signing & Capabilities" tab.
Enable Push Notifications#
Next the "Push Notifications" capability needs to be added to the project. This can be done via the "Capability" option on the "Signing & Capabilities" tab:
- Click on the "+ Capabilities" button.
- Search for "Push Notifications".
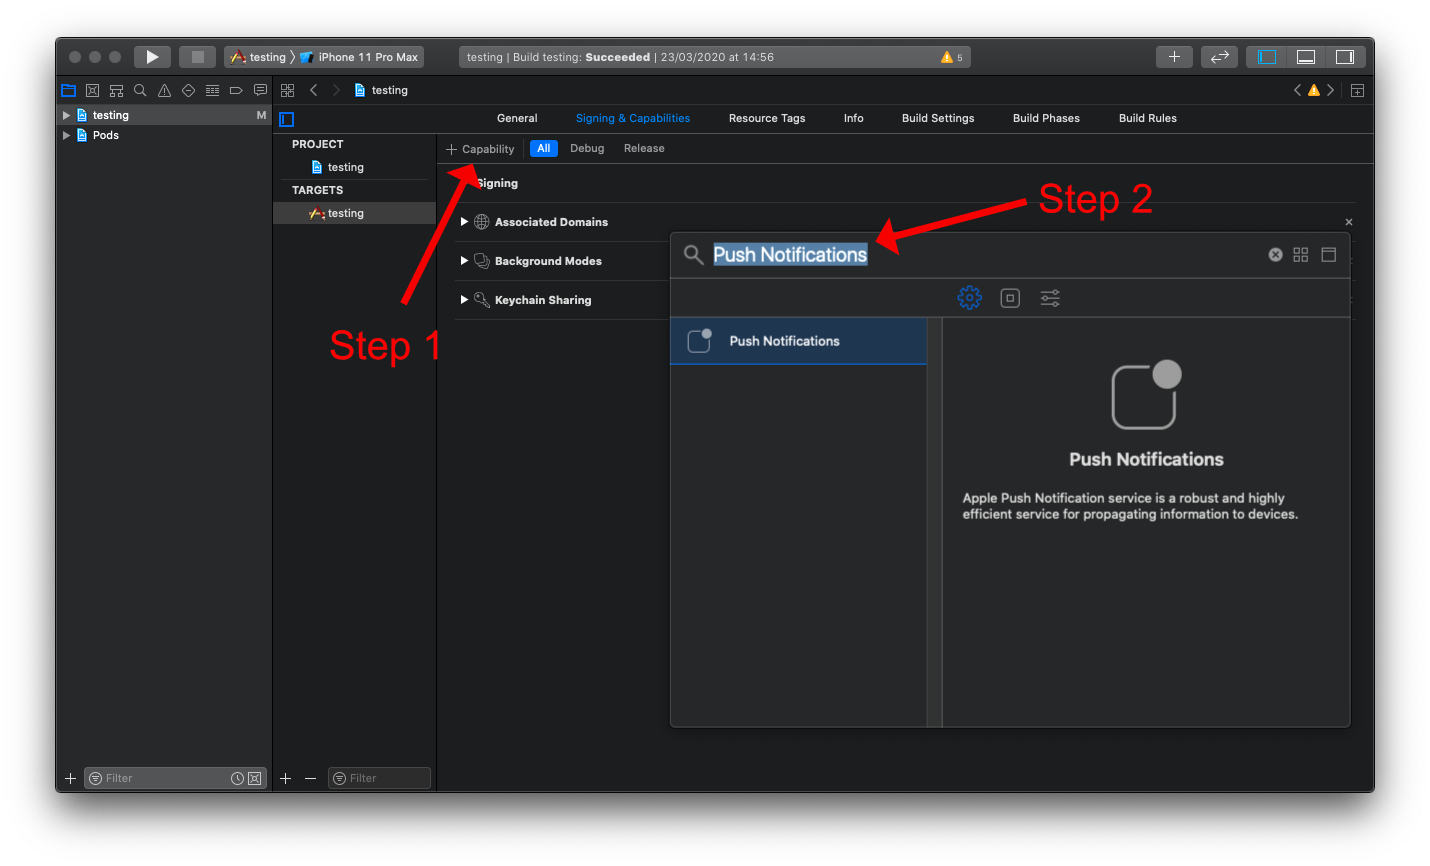
Once selected, the capability will be shown below the other enabled capabilities. If no option appears when searching, the capability may already be enabled.
Enable Background Modes (iOS only)#
Next the "Background Modes" capability needs to be enabled, along with both the "Background fetch" and "Remote notifications" sub-modes. This can be added via the "Capability" option on the "Signing & Capabilities" tab:
- Click on the "+ Capabilities" button.
- Search for "Background Modes".

Once selected, the capability will be shown below the other enabled capabilities. If no option appears when searching, the capability may already be enabled.
Now ensure that both the "Background fetch" and the "Remote notifications" sub-modes are enabled:
Linking APNs with FCM#
Note: APNs is required for both
foregroundandbackgroundmessaging to function correctly on iOS.
A few steps are required:
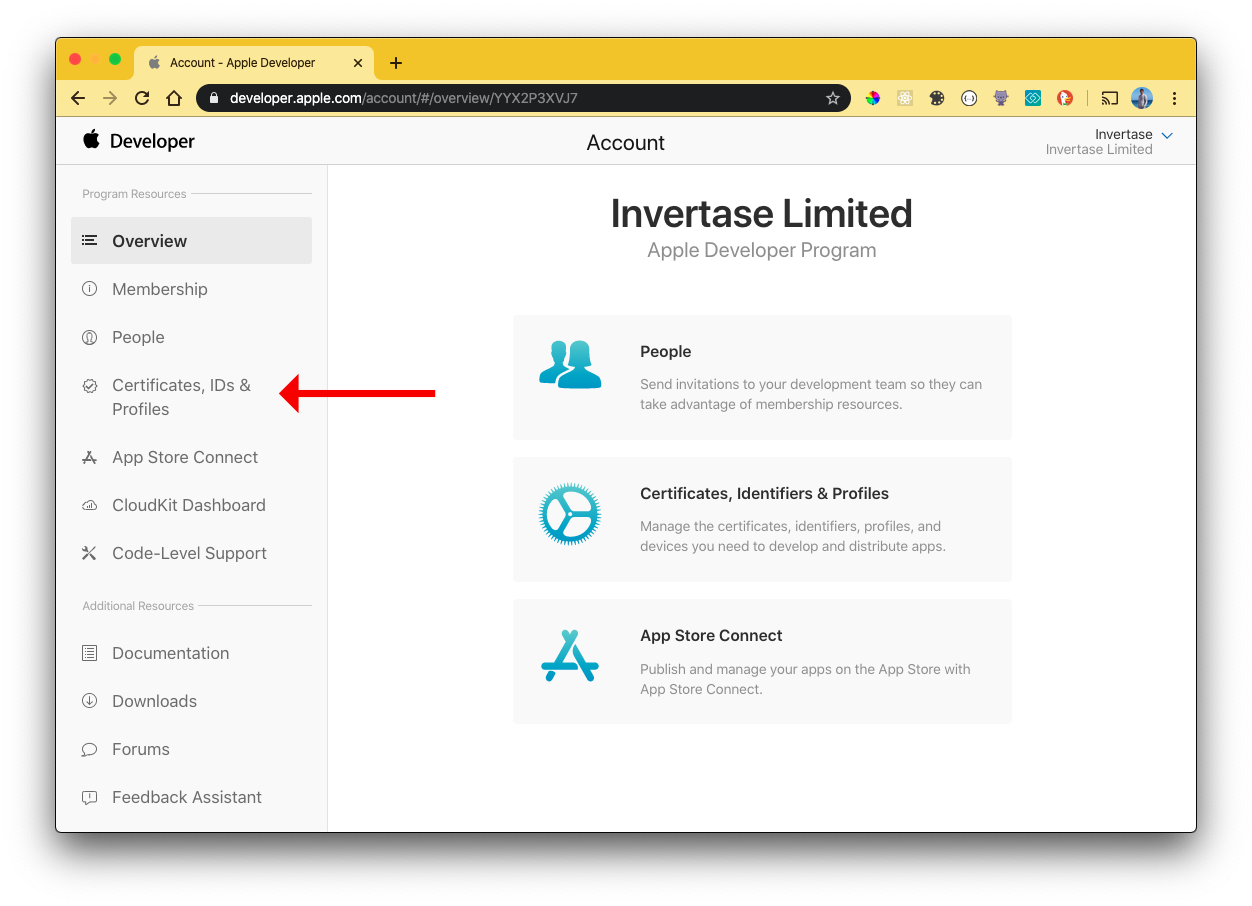
All of these steps require you to have access to your Apple Developer account. Once on the account, navigate to the Certificates, Identifiers & Profiles tab on the account sidebar:
1. Registering a key#
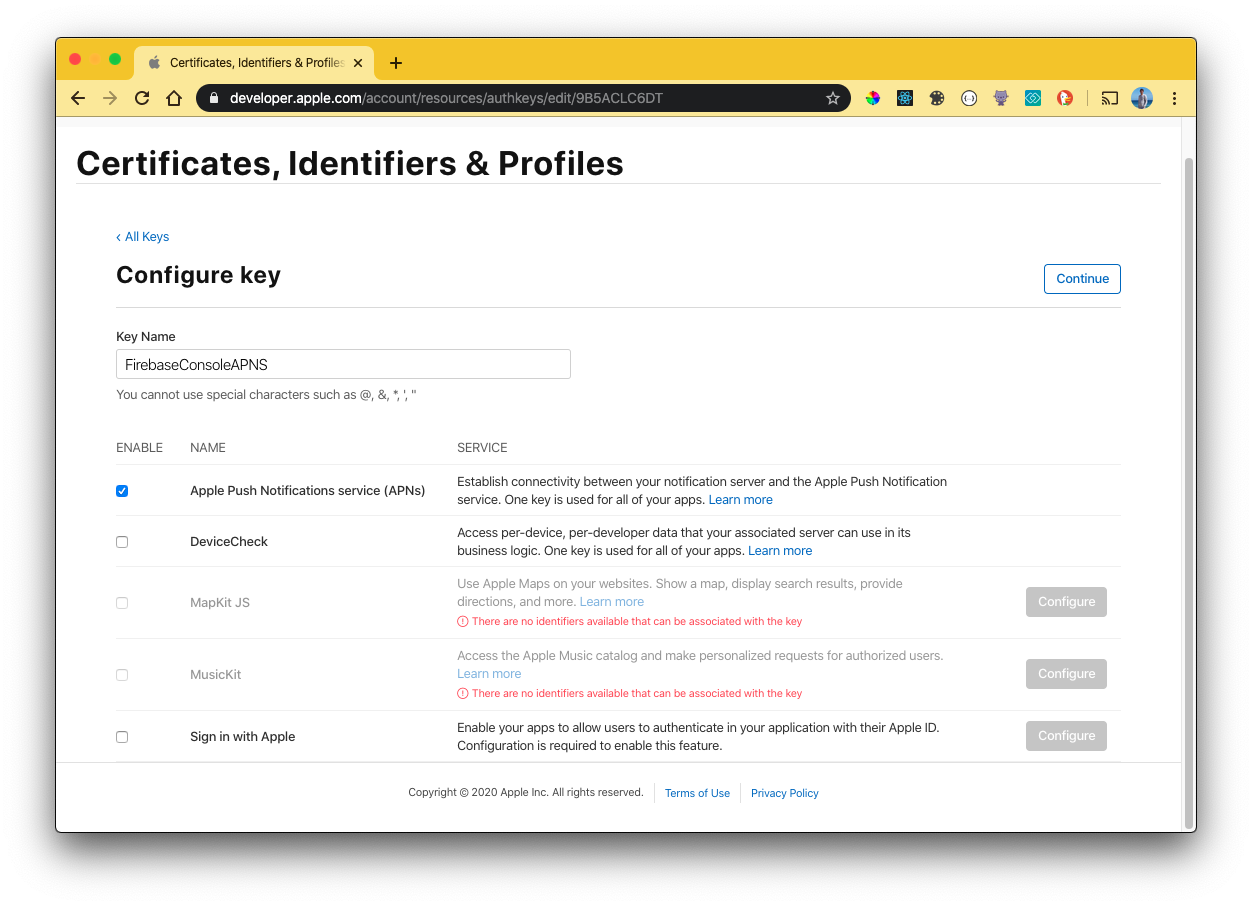
A key can be generated which gives the FCM full access over the Apple Push Notification service (APNs). On the "Keys" menu item, register a new key. The name of the key can be anything, however you must ensure the APNs service is enabled:
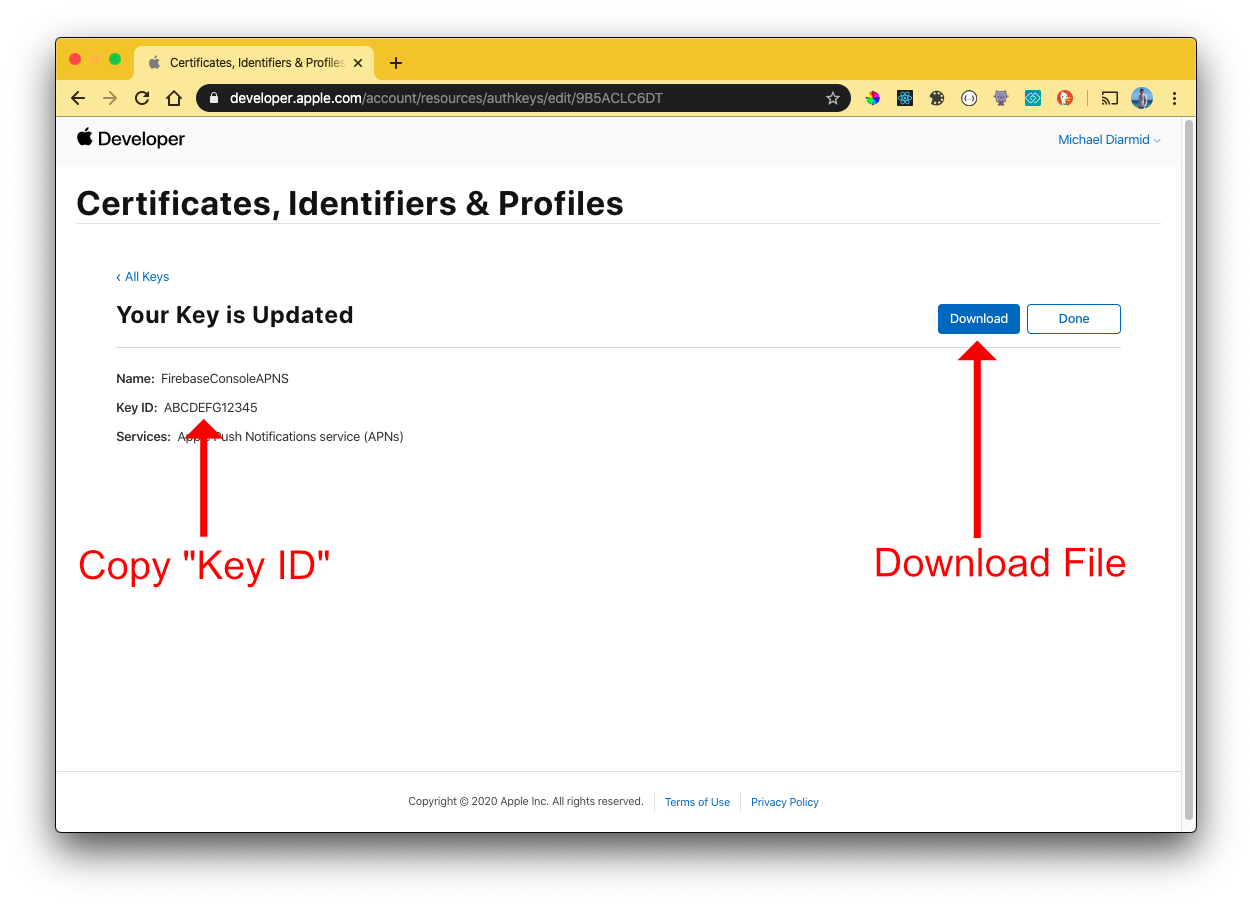
Click "Continue" & then "Save". Once saved, you will be presented with a screen displaying the private "Key ID" & the ability to download the key. Copy the ID, and download the file to your local machine:
The file & Key ID can now be added to your Firebase Project. On the Firebase Console, navigate to the "Project settings" and select the "Cloud Messaging" tab. Select your iOS application under the "iOS app configuration" heading.
Upload the downloaded file and enter the Key & Team IDs;
2. Registering an App Identifier#
For messaging to work when your app is built for production, you must create a new App Identifier which is linked to the application that you're developing.
On the Apple Developer portal:
- Click the "Identifiers" side menu item.
- Click the plus button to register a App Identifier.
- Select the "App IDs" option and click "Continue".
- Select the "App" type option and click "Continue".
The "Register an App ID" page allows you to link the identifier to your application via the "Bundle ID". This is a unique string which was generated when starting your new Flutter project. Your Bundle ID can be obtained within Xcode, under the "General" tab for your project target:
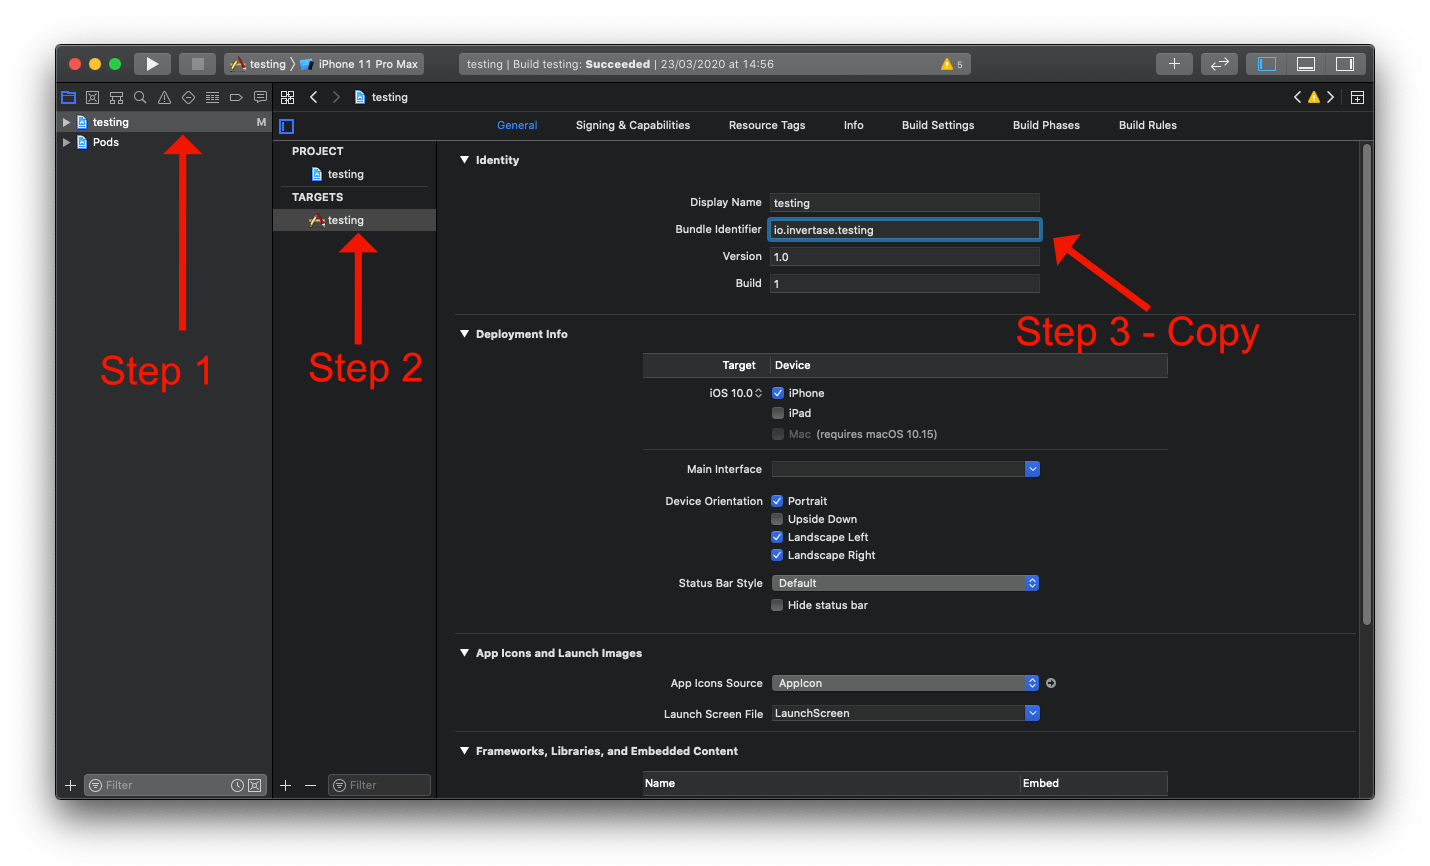
On the Apple Developer portal "Register an App ID" page, follow these steps to create your identifier:
- Enter a description for the identifier.
- Enter the "Bundle ID" copied from Xcode.
- Scroll down and enable the "Push Notifications" capability (along with any others your app uses).
Save the identifier, it'll be used when creating a provisioning profile in the next step.
3. Generating a provisioning profile#
A provisioning profile enables signed communicate between Apple and your application. Since messaging can only be used on real devices, a signed certificate ensures that the app being installed on a device is genuine and has the correct permissions enabled.
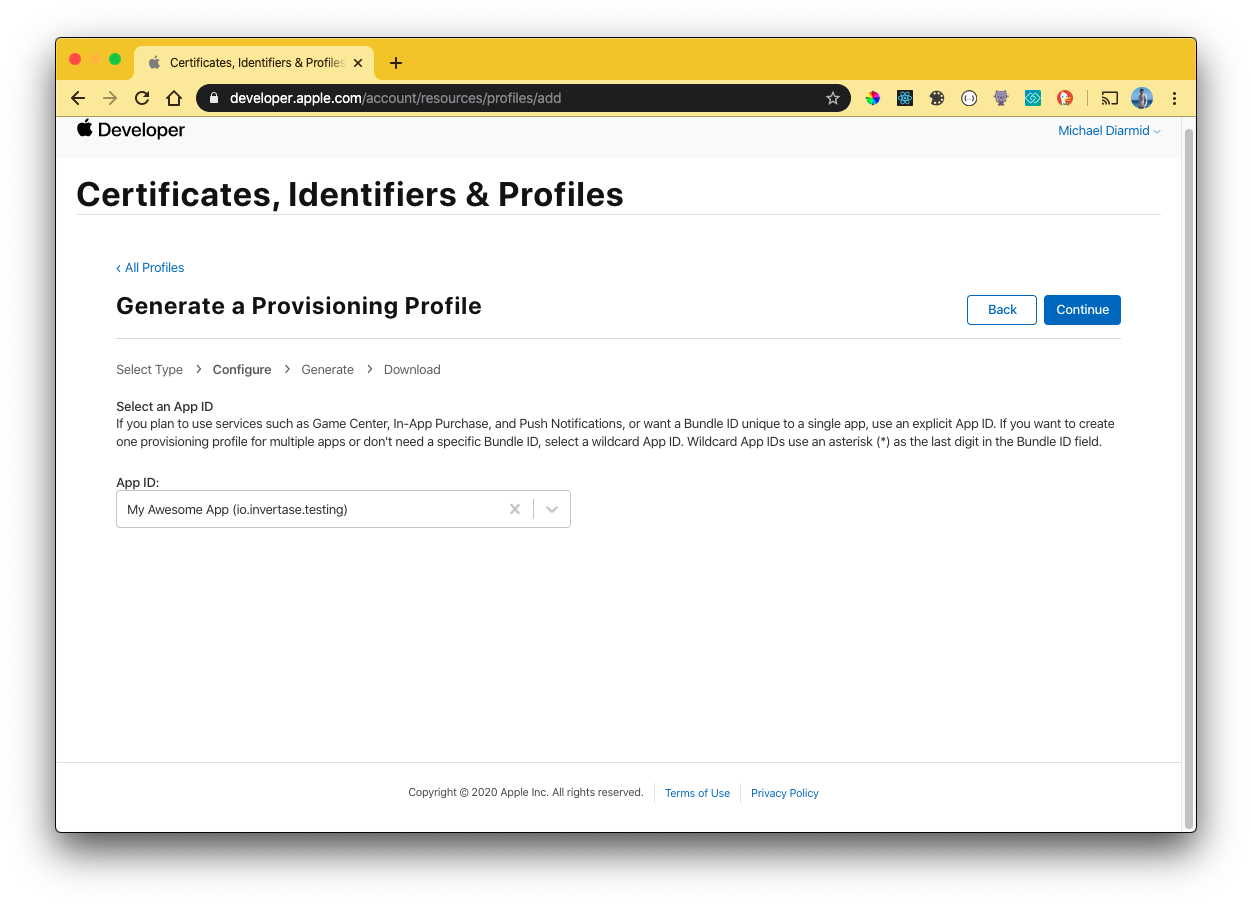
On the "Profiles" menu item, register a new Profile. Select the "iOS App Development" (or macOS) checkbox and click "Continue".
If you followed Step 2 correctly, your App Identifier will be available in the drop down provided:
Click "Continue". On the next screen you will be presented with the Certificates on your Apple account. Select the user certificates that you wish to assign this provisioning profile too. If you have not yet created a Certificate, you must set one up on your account.
To create a new Certificate, follow the Apple documentation. Once the Certificate has been downloaded, upload it to the Apple Developer console via the "Certificates" menu item.
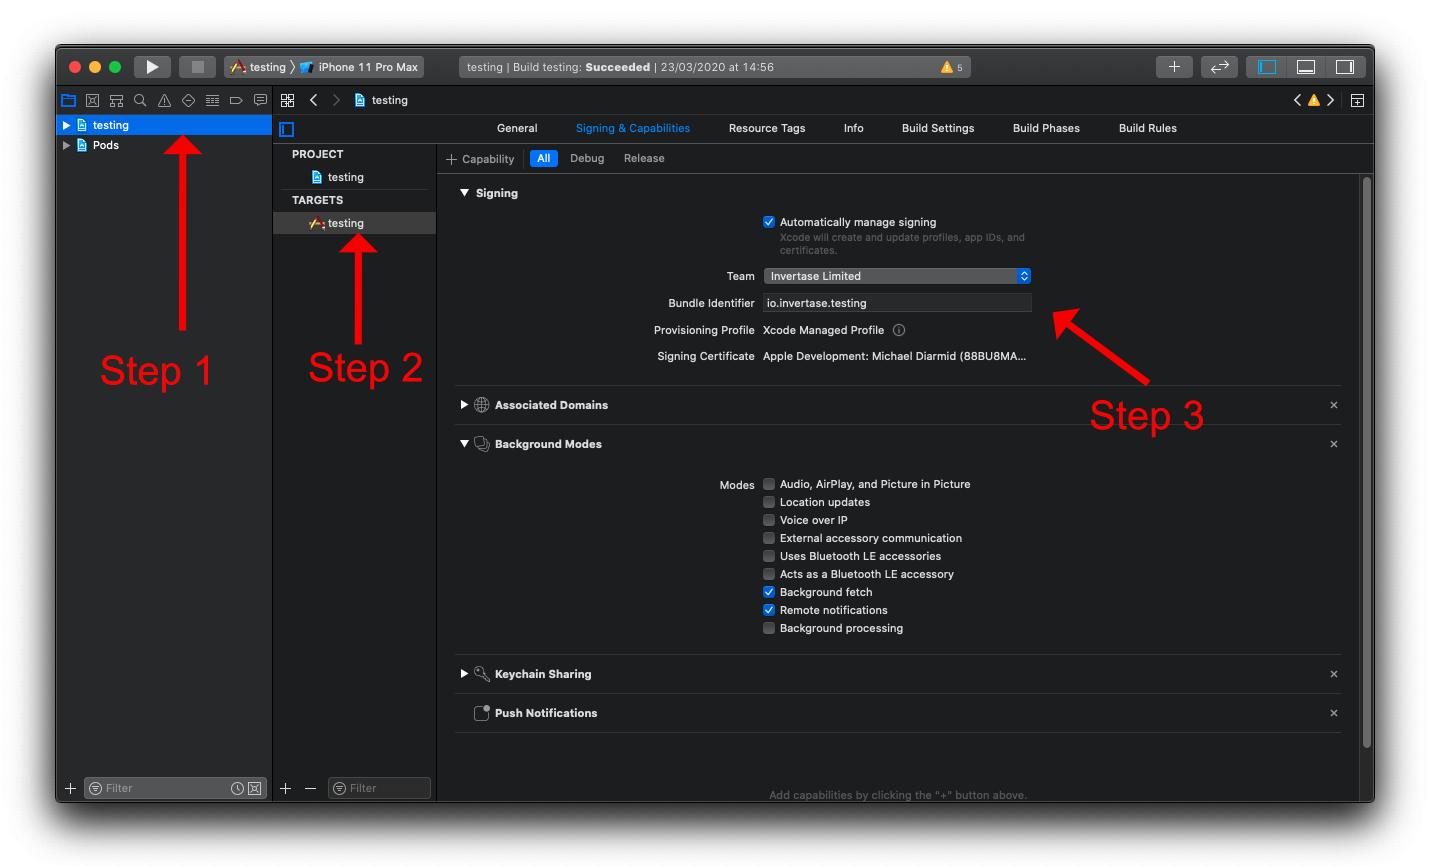
The created provisioning profile can now be used when building your application (in both debug and release mode) onto a real device (using Xcode). Back within Xcode, select your project target and select the "Signing & Capabilities" tab. If Xcode (via Preferences) is linked to your Apple Account, Xcode can automatically sync the profile created above. Otherwise, you must manually add the profile from the Apple Developer console:
- Select the project (usually called 'Runner') in the left hand side project navigator.
- Select the project target under the 'Targets' heading, usually called 'Runner'.
- Select the Signing & Capabilities tab.
- Assign the provisioning profile in the 'Signing' section.
(Advanced, Optional) Allowing Notification Images#
If you want to know more about the specifics of this setup read the official Firebase docs.
On Apple devices, in order for incoming FCM Notifications to display images from the FCM payload, you must add an additional notification service extension. This is not a required step.
Step 1 - Add a notification service extension#
- From Xcode top menu go to: File > New > Target...
- A modal will present a list of possible targets, scroll down or use the filter to select "Notification Service Extension". Press Next.
- Add a product name (use
ImageNotificationto follow along), setLanguagetoObjective-Cand click Finish. - Enable the scheme by clicking Activate.
Step 2 - Add target to the Podfile#
Ensure that your new extension has access to Firebase/Messaging pod by adding it in the Podfile:
- From the Navigator open the Podfile: Pods > Podfile
- Scroll down to the bottom of the file and add:
- Install or update your pods using
pod installfrom theiosand/ormacosdirectory.
Step 3 - Use the extension helper#
At this point everything should still be running normally. This is the final step which is invoking the extension helper.
- From the navigator select your
ImageNotificationextension - Open the
NotificationService.mfile - At the top of the file import
FirebaseMessaging.hright after theNotificationService.has shown below:
- Replace everything from line 24 to 27 with the extension helper:
Step 4#
Your device can now display images in a notification by specifying the imageUrl option in your FCM payload. Keep in mind that a 300KB max image size is enforced by the device.
Next steps#
Once the above has been completed, you're ready to get started receiving messages on your iOS and/or macOS device for both testing and production.
View the Usage documentation to get started.